


SmartHub Vyapar App FAQs
Most Common FAQs
1. How do you accept payments using SmartHub Vyapar App?
A. You can accept payment on SmartHub Vyapar App using any of the following payment collection options
• Cards (Tap & Pay)
• Bharat QR - Scan & Pay
• UPI Collect
• SMS Pay.
2. Do we get SmartHub Vyapar QR code physical standee /decal?
A. Yes. HDFC Bank sends a kit with your personalised store QR code in a standee and a sticker. Depending on your location, it usually takes a few days to deliver. This can be tracked in the app itself with these steps:
• Tap on 'More' from the bottom navigation tab and select “Profile”
• Tap on 'My Orders' where all orders will be displayed.
3. How do you collect payments via SmartHub Vyapar physical QR standee / sticker?
A. Ensure the SmartHub Vyapar Standee is prominently placed in your store for maximum visibility for your customers:
• Post scanning the QR code from any of the PSP App – your name and VPA will be displayed
• Customer needs to enter the amount and complete the transaction with the MPIN/Card OTP
• You will be notified on SmartHub Vyapar instantly
4. What is the difference between a BQR (Bharat QR) and a UPI QR?
A. BQR (Bharat QR) allows customer to make payments using cards as well as UPI, whereas UPI QR allows customers to make payments using only UPI. SmartHub Vyapar offers you the flexibility to accept payments via both cards and UPI.
5. How do you know if the payment is successful?
A. SmartHub Vyapar app notifies merchants in three ways post successful transaction completion:
• SMS on registered mobile number
• In App notification
• Voice notification
6. How do you enable / disable voice notification?
A. To enable or disable voice notification on SmartHub Vyapar App, simply follow these steps:
Step 1: - Login in to SmartHub Vyapar, click on ‘More’ and select ‘Profile’ section
Step 2: - Click on ‘Settings’ and select ‘Notification’. You will get the option to Enable/Disable and the language of your choice.
7. When does the payment get settled into the bank account?
A. Payments get settled on the next day into the bank account. However, there is an option of switching to instant settlement in the App (More > Profile > Instant settlement > Switch) and getting payment settlements instantly into the bank account for UPI based payments.
1. What is Bharat QR?
A. Bharat QR is a network approved QR code which supports payment acceptance via cards and UPI.
2. How do I accept payments through Bharat QR?
A. You have two options. Either use a Static QR provided to you in a physical standee format / digital copy in the App or generate a QR from the app.
Option 1: - Using Static QR On the App
You can display QR code with a smartphone by following the below steps: -
Step 1: Go to Payments Tab from the navigation bar
Step 2: Select 'Static QR'
Step 3: Display QR to customer for scan and completing the journey via any of the UPI enabled Apps.
Option 2: - By generating Dynamic QR code in SmartHub Vyapar
Step 1: Go to Payments Tab from the navigation bar
Step 2: Select 'Bharat QR' below payment modes
Step 3: Enter customer mobile number and amount
Step 4: Tap on 'Generate QR'
Step 5: Once the QR is generated you can share or display QR to the customer and they can scan the QR through any of their UPI enabled apps and complete the payment.
3. Can we download / share Bharat QR?
A. Yes. You can share your Bharat QR you can follow the steps below: -
Step 1: Go to Payments Tab from the navigation bar
Step 2: Tap on ‘Static QR'
Step 3: Your Static QR will be displayed with two options ‘Share’ and ‘Download’
Step 4: Select either one of the options to proceed.
1. What is SMS Pay?
A. SMS Pay is a payment mode available in SmartHub Vyapar for accepting card payments remotely. You can send SMS to your customers which has a payment link embedded.
2. How do I initiate payment through SMS pay?
A.
Step 1: Go to payments dashboard and tap on 'SMS Pay'
Step 2: Enter the customer mobile number and amount you want to collect
Step 3: Tap on 'Initiate Payment'.
3. How will the merchant find if the payment is received?
A. Once the customer has completed the payment using his Credit Card and Debit Card, the same will reflect in the SmartHub Vyapar App.
4. Can the card holder modify the value before processing the payment?
A. No. The card holder cannot modify the amount.
5. Can customer use any network cards for making payments through SMS Pay?
A. As of now Visa/Master and Rupay Cards can be used for making remote payments through SMS Pay.
6. Is there any MDR for SMS Pay?
A. Yes. The standard MDR will be applicable for accepting payments via SMS Pay.
7. What is UPI Collect?
A. UPI Collect is a payment mode in the SmartHub Vyapar App for collecting payments remotely without any MDR.
8. How to initiate payment via UPI Collect?
A.
Step 1- Go to Payments section from the Navigation bar
Step 2- Tap on 'UPI Collect ‘and enter the customer's mobile number and amount you want to collect
Step 3- Send the collect request via SMS Link /WhatsApp or enter UPI id
Step 4- Tap on 'Initiate Payment'.
9. Is there a limit to collect payments through UPI Collect?
A. There is no limit at SmartHub’s end on collecting UPI Collect payments but there could be a limit from the payment maker’s bank.
1. What is Tap N Pay?
A. Tap N Pay is feature which enables you to accept card payments from the customers on the SmartHub Vyapar App provided your smartphone should have NFC functionality.
2. How do I find out if the merchant's phone has NFC feature?
A. Go to Settings and search for NFC option. Icon appears which means the phone has NFC feature.
3. How do I find out if the customer's card is contactless?
A. Customer's card having wave-like symbol that looks like a wi-fi symbol on the front side of the card is an identifier of a contactless card.
4. Is there a limit on Tap N Pay transactions?
A. Payments up to ₹5,000 can be accepted through SmartHub Vyapar via cards on the Tap n Pay.
5. Can a customer use any network cards for making payments via Tap N Pay?
A. As of now, SmartHub Vyapar allows merchants to accept Visa/Master/Rupay cards using SmartHub Vyapar.
6. Why does this message come: “Tap N Pay works only on NFC enabled phones”?
A. This message appears if the mobile phone does not have the NFC feature.
1. What are the various loan options available on SmartHub Vapar App?
A. Various loan options available in the App are: (All these are subject to eligibility)
Business Loan
Dukandar Overdraft
Loan on Credit Card
2. How to apply or check eligibility for loans through SmartHub Vyapar App?
A. To apply or check eligibility for loans through Smarthub Vyapar App follow these steps:
Step 1 – Select Bizview from the Navigation pane (bottom of the screen)
Step 2 – Scroll down and select “View All” in “Grow your Business” section
Step 3 – Tap on “Get easy loans with HDFC Bank”
Step 4 – Select the amount and tenure from the given options and click on “Show Loan Options”
Step 5 – If eligible for a preapproved offer, the amount will be displayed on that specific loan options.
Step 6 – If not then click on “Apply now” to initiate application.
BUISNESS LOAN
1. What is the maximum amount which can be availed for a Business Loan?
A. The Business Loan can be availed upto ₹75 lakhs subject to approvals.
2. What is Business Loan in 10 sec?
A. HDFC Bank offers pre-approved Business loans to select customers via the Smarthub Vyapar App which can be instantly credited in your account in 10 seconds.
3. Are there any documents required for availing a Business Loan in 10 sec?
A. There are no documents required for availing a pre-approved Business Loans if you are a KYC compliant HDFC Bank customer.
4. If I am not a Pre-approved Business Loan customer, can I apply for a business loan via the Smarthub Vyapar App?
A. Yes, you can apply for Business Loan through the SmartHub Vyapar App itself and upload the required documents mentioned.
5. What is the interest rate to avail Business loan?
A. Interest rate – 11.90% - 21.35%.
6. Which bank account will the EMI be debited from?
A. EMI will be deducted from the account in which the loan disbursal is made and e-mandate has been setup.
7. I have completed the journey but haven’t received disbursement. What should I do?
A. Disbursement is expected as per standard NEFT guidelines for successful (complete) cases. In case the disbursement isn’t received on the same, then raise concern with the nearest branch.
DUKANDAR OVERDRAFT
1. What are the benefits of Dukandar Overdraft?
A. Benefits of Dukandar Overdraft
Overdraft facility upto ₹10 Lakhs.
No business financials required.
No requirement for submission of stock statement.
No collateral security needed.
2. What is the loan pricing?
A. Loan pricing details:
ROI @ 16% (Floating rate)
Processing fees – 2%+GST
Renewal Fees – 0.50% +GST
3. What are the main features of this loan?
A. Important key features of the loan are:
Overdraft facility - Minimum ₹50,000 to maximum ₹10 Lakhs.
Interest to be serviced only on utilised amount.
No commitment charges.
Limits will be subjected to annual renewal.
4. What is the initial documentation required at the time of application?
A. 12-month Bank Statement of Current Account or Savings Account Is required. Merchants active on NetBanking on Current Account or Savings Account can login to NetBanking via the loan journey and the bank statement will be automatically spooled. Saving account will also be considered for evaluation.
5. What are the eligibility criteria for this loan?
A. Details:
Target Segment: Small retailers, shopkeepers, Kirana stores and service providers, Classified as micro enterprises only.
Eligible entities - Proprietorship and individual with Business Current Account holders.
Udhyam Registration Certificate.
Biz Vintage: Minimum 3 years Biz Vintage in the same Biz and same location for loans upto ₹7.50 Lakhs. Minimum 4 years Biz Vintage in the same Biz and same location for loans(> ₹ 7.50 Lakhs to ₹10 Lakhs)
Minimum banking relationship for HDFC Bank Customer and Other Bank Customer is 12 months.
6. What is UDHYAM REGISTRATION CERTIFICATE and how can one generate it?
A. UDHYAM REGISTRATION CERTIFICATE (URC NO.) is a mandatory requirement for PSL classification and to report the same under
MUDRA Scheme. (Please note URC is not a KYC OVD document for Business entity identification or Business entity address. It is considered only for PSL classification.). Generation of URC is simple and takes 5 to7 mins, with selection of correct NIC code by the customer. Customer can visit: https://udyamregistration.gov.in/Government-India/Ministry-MSME-registration.htm.
LOAN ON CREDIT CARD
1. What is a Loan on Credit Card?
A. It’s a pre-approved Loan on HDFC Bank Credit Card which you can get in your A/c instantly.
2. What are the different types of Loan on Credit Card?
A. There are 2 types of Loan on Credit Card available:
Insta Loan: This Loan amount is within your available Credit Card limit.
Jumbo Loan: This Loan amount is over and above your HDFC Bank Credit Card limit.
3. What is the Interest Rate and tenure for this Loan?
A. Interest rate starts @1.25% per month (subject to change) depending on the tenure that ranges from 12 months to 60 months.
4. What are the documents required?
A. No document is required to avail Loan on Credit Card.
5. How soon can I receive money in my account once I apply for an Insta Loan?
A. Once you confirm, you can get the money instantly into your HDFC Bank Savings A/C via our online loan process. In case, you don’t have an HDFC Bank Savings A/c, loan will be credited to the customer’s other bank account through NEFT/RTGS/IMPS.
6. What is process to pre-close the loan on credit card?
A. Customer can pre-close the loan by contacting customer care service and requesting for loan pre-closure Invoke request. Customer is liable to pay pre-closure fee i.e. 3% of loan amount outstanding plus 18% GST on it and applicable pro- rata interest. Note that once loan is pre-closed, it cannot be re-instated/rebooked.
7. Can the customer make partial payments to clear loan amount outstanding?
A. Customer cannot make partial payments towards Loan on Credit Card products. Customer can repay loan amount by settling monthly EMIs, which will be billed to customer’s card account.
8. Do we charge Processing Fee for Insta / Jumbo loan?
A. To know applicable Processing fee, customer is required to refer to terms and conditions document of respective loan product.
9. How can a customer make payment towards Insta Loan EMI?
A. Insta loan EMI payment will be part of customer’s primary HDFC Bank Credit Card monthly Statement. Customer is required to clear monthly Credit Card outstanding bill.
1. What is Offers & Rewards module?
A. The Offers & Rewards module helps you increase footfalls and sales at your outlet by creating and sharing discount offers with your customers on Social Media and WhatsApp. Customers can then be given discounts on the payments that you accept through the SmartHub Vyapar App.
2. How can I create an offer?
A. You can then create an offer by clicking on the icon available on the top right corner on the Offers & Rewards main landing Page. You can then choose from the following 3 options:
Option a - Use one of the ready-made templates to create a Flat off, a Percentage off or a customer segment-based discount
Option b - Use Express Option with limited configuration options
Option c - Use Custom option with more configuration options
In case you have created an offer that worked well for you, you can reuse the same offer as well.
3. Are there any templates available for offer creation?
A. Yes, you have the option to create an offer using the following three templates available on the Offer Creation Landing Page:
Percentage discount template offering 10% off up to ₹100 on transactions above ₹500.
Flat amount off template offering ₹50 off on transactions above ₹500
Customer segment template offering 10% off up to ₹100 on transactions above ₹500 to selected users who’ve spent ₹10000 or more in the previous month.
You are expected to enter Basic details of the offer (Offer name, start and end date) and then activate the offer. You can also make any changes to the offer amounts as per your requirement.
4. How do I share an offer that I’ve created?
A. Once created your offer is visible in the Active Offers section on the Offers and Rewards main landing page. Once you have scrolled to the offer you want to share, take the following steps:
a. Tap on the Selected Offer to go to the Offer Details page
b. On the Offer Details page, you will see the offer banner with a Share icon on the top right
c. Tap on the Share Icon and share to your preferred social media platforms and messaging apps, including WhatsApp.
5. What kind of offers can I give?
A. You can give discounts to your customers in the following ways:
Percentage discount on the overall transaction amount with a limit set to the maximum discount amount
Flat discount on a transaction above a pre-determined amount
A percentage/flat discount for customers who qualify for discounts based on certain criteria (# of transactions, total amount of all transactions, either or a combination of both), e.g., customers who have done 3 transactions in a month.
6. Can I give out offers to selected users?
A. Yes, you can give offers to selected customers based on the customer’s transaction history. The option is available as a part of Customer Segment option in Create from Template section or the Custom offer creation journey where you can create a Customer Segment (selected set of customers) \ based on the total transactions, total spend, either of them or a combination of both. You can choose limit these criteria for a particular time frame as well.
7. Can I restrict the payment modes on which an offer is redeemed?
A. Yes, you can restrict the offer redemption to a particular payment mode. By default, the offer is valid on all transaction modes, except Pay Later, transactions on which are ineligible for discounts. The option to restrict payment modes for offer redemption can be found in the Reward Criteria section as a part of Custom offer creation journey.
8. Can I restrict the number of times an offer is redeemed?
A. Yes, you can restrict the number of times an offer can be redeemed. By default, there are no restrictions set on redemption, however you can add those in the Reward Restriction section as a part of the Custom offer creation journey. The offer can be restricted at a customer, brand, City or Location level. In case, there is conflict between two restrictions, the priority for the restrictions shall be:
Customer
Brand
City
Location
9. Can I reuse previous offers created?
A. Yes, you can reuse previous offers to create a new one. On initiating offer creation, you can view the last 7 offers created which can be selected for reuse as a new offer. This is visible in the Select from previous offers section. You can also view all the offers you have created till date, by using the View All option. After selecting an offer, you need to mandatorily modify the offer start and end dates. You can choose to modify other base offer details as well.
10. Where can I view active offers?
A. You can view the count of active offers on the Bizview dashboard. Also, the Offers & Rewards Landing page shows the active offers along with its banner and performance till date (Total redemptions, total unique customers redeeming, and total discount given). You can scroll to the right to view all active offers. You can also click on the offer banner to view details of the offer along with performance of the active offer over time.
11. Where can I view previously created offers?
A. You can view previously created offers on the offer’s dashboard. The offers dashboard, accessed through the tap on Offers & Rewards Card on Bizview, shows the count of previously created offers under the Completed Offers bar. You can click on the bar to access the list of all completed offers along with total redemptions and the discount given over the offer duration. You can also click on the offer to view details of the offer along with performance of the offer over time along with an option to reuse the offer if required.
12. Where can I view offers scheduled to go live?
A. You can view scheduled offers on the offer’s dashboard. The offers dashboard shows the count of scheduled offers under the Scheduled Offers bar. You can click on the bar to access the list of all scheduled offers along with time remaining before the offer goes live. You can also click on the offer to view details of the offer along with an option to update offer configurations if required.
13. Can we analyse previous offers’ performance?
A. You can analyse performance of previous offers on the offer dashboard. Based on the time frame selected, the dashboard populates the count of offers that were active along with the total redemptions, total discount given and total unique customers who redeemed an offer. Additionally, you can also view total sales, total transactions and total unique customers who transacted with you in the selected time frame for analysing offer metrics against the total metrics. You can also compare performance of offers over time (max four at a time) across three metrics (total redemptions, total discount given and total unique customers).
CAMPAIGNS
1. How does the Campaign module work?
A. The Campaigns module allows you to create communication banners on the platform and to share the same with your customers through various social media platforms or messaging apps such as WhatsApp. You can access the campaign module by tapping on the campaign card available on the BizView dashboard; also, can be accessed through the Profile section.
2. How can I create communication content?
A. Steps to create communication content:
Access the Campaign Module by tapping on the Campaign Card on the Biz View Dashboard or from the Profile section
Click on the icon available on the top right corner on the first page of the campaign module.
Alternatively, you can also create communication content by clicking on the Create Now link on the Campaign card on the BizView section.
Enter the communication name, select the template type, and enter the required communication content, based on your communication banner will be created.
3. Which are the templates available for creating content?
A. There are three different templates which are available for you to create communication content, which are as follows:
A square image and text communication template enabling you to create content which includes a header, description an image and a footer.
A square communication template with only text which includes a header, a detailed description, and a footer.
A rectangular communication template enabling you to create content which includes a header, a description, an image, and a footer.
4. How can I share communication content through the Campaigns module?
A. You can share communication content after you have successfully created content by clicking on the share button available at the bottom of the summary screen. On clicking the share option, you would see the option to share the communication image through all the applications that are available on your device.
5. Can I view previous communication content created?
A. Yes, you have the option of viewing communication content which you have previously created which can be accessed from the Campaign history card which highlights the number of such campaigns on the campaign section. Clicking on the card, lists down all previous communication material created and shared through the platform.
1. How can we make vendor payments on the SmartHub Vyapar App?
A. Merchants can make vendor payments using their HDFC Bank Business Credit Card on SmartHub Vyapar App. Steps:
Step 1 – Tap on Bizview option from the navigation bar (bottom of the screen)
Step 2 – Scroll down and tap on Grow your Business – “View More”
Step 3 – Tap on “Manage Your Vendor payments” in Vendor payments section
Step 4 – Click on “Make payment”
Step 5 – Click on proceed and select a browser.
Step 6 – Click on Vendor Payment
Step 7 – Select / Add vendor and click on “Pay Now”
Step 8 – Enter Invoice details and verify and click on “Verify and Pay”.
2. How can the merchant add his/her supplier/vendor/distributor details?
A. Follow the steps
Click Manage Vendor
Select Add Vendor
Fill up GSTIN to auto-populate most of the fields
Add account details of the vendor and save
3. How will the merchant know if vendor is approved?
A. Follow the steps
Click Manage Vendor
Select Approved Vendor
Merchant notification will be sent on email id and mobile number once vendor is approved.
4. What is the process and TAT for validation of the supplier/vendor/distributor details added by the merchant?
A. The current TAT for validation is 30minutes and is done by V2P team based on the GSTIN and account details provided. V2P team does a penny drop of ₹1 in the supplier/vendor/distributor account for validation. Vendor will be notified on mobile number of his registration on V2P to receive payments.
5. Can a merchant edit/delete vendor detail?
A. Yes, the same can be done under manage vendor option.
6. How many vendors/distributors can a merchant add?
A. There is no limit to adding vendors/distributor.
7. How can a merchant make GST payment?
A. Follow the steps
Click on GST Payment
Upload GST Chalan and Click pay now
Add card credentials and complete the payment.
8. How do merchants fetch new bill?
A. Follow the steps
Click on Bill Payment
Select Biller List
Click fetch Bill.
9. Can bill be auto-fetched?
A. Bills are auto fetched for all the approved and added billers.
10. How can a merchant make Bill payment?
A. Follow the steps:
Fetch bill from Biller List
Upload GST Chalan and Click pay now
Add card credentials and complete the payment.
11. Is there any transaction limit for the merchant?
A. There is transaction limit of ₹50,000 per transaction.
12. What is the maximum vendor payment limit for the merchant?
A. There is payment limit of ₹2 Lakh per vendor/supplier/distributor per month.
13. Are there any charges to merchants making payment using V2P?
A. If the merchant uses HDFC Business Credit card for making the payment then he will be charged 1% flat interest in the next bill. However, there will be no charges for using UPI. Note there is no MDR but the 1% charges on credit card is mandatory and cannot be waived off.
14. How can a merchant view his historical transactions?
A. Follow the steps
Click on Transaction report
Select Payment Type
Select Date
Fetch Report
Download Report in Excel.
15. What is Pay Later?
A. Record, track and collect outstanding customer dues digitally through Pay Later feature In the App.
16. How do I save a Pay Later transaction?
A. To initiate a payment via Pay Later you can follow the below steps: -
Step 1: Click on Payments tab from the navigation bar (bottom left of the screen)
Step 2: Tap on 'Pay Later' from payment modes section
Step 3: Enter the customer mobile number / amount and other details (for first txn only)
Step 4: Tap on 'Save Transaction'.
17. How do I settle amounts against Pay Later transactions?
A. To settle a Pay Later transactions, you can follow the below steps: -
Step 1: Click on Payments tab from the navigation bar (bottom left of the screen)
Step 2: Scroll down and tap on 'View More” on the Pay Later section
Step 3: Scroll and tap on the specific customer to open the customer card
Step 4: Tap on 'Settle Amount'
Step 5: Choose between 'Full Amount' or 'Partial Amount'
Step 6: Enter Amount in the case of 'Partial Amount'
Step 7: Select Payment mode used to settle the amount
Step 8: Tap on 'Collect Payment'
Step 9: Enter Description
Step 10: Tap on the confirmation button.
18. How do I remind or contact my customer from the app?
A. To send a reminder to a customer you can follow the below steps: -
Step 1: Click on Bizview tab from the navigation bar (bottom of the screen)
Step 2: Scroll down and tap on 'View All' on the Pay Later section
Step 3: Scroll and look for the specific customer
Step 4: Swipe left to send a 'WhatsApp' reminder message or swipe right to call the customer.
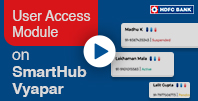
19. Can merchants give access of SmartHub Vyapar App to their staff?
A. User access is a feature within the HDFC Bank SmartHub Vyapar that allows you to add users and assign roles to the staff- Cashier/Manager, outlets and location wise. With user access feature you can enhance the business operations by managing your single or multiple outlets on fingertips.
20. How to add a new user in SmartHub Vyapar?
A. You can add a new user by following the below steps: -
Step 1: Tap on ''More'' from the bottom navigation bar.
Step 2: Tap on the profile option
Step 3: Select ‘User Access’ option from the list
Step 4: Click on the + symbol in the Top right of the screen
Step 5: Enter the Individual’s details who you want to add as a user - Mobile number, Full name and Email address (all of these details are mandatory).
Step 6: Assign a role to this user
Step 7: In case of multiple locations, select the location for which access has to be granted
Step 8: Tap on Success.
Watch Video: https://youtu.be/4KlqYJXFJu0
21. As a business owner, can we add more than one role for a single user?
A. Yes, you can add more than one role for a user.
22. What can a Manager L1, view and access?
A. Manager L1 can give access rights to Manager L2 and Cashiers. Manager level L1 has access to business analytics, payments and reports.
23. What can a Manager L2, view and access?
A. Manager L2 can access to business analytics, accepting payments and will be able to generate reports.
24. What can a cashier, view and access?
A. Cashier cannot give any rights to Manager L2 and Cashiers.
Cashiers does not have access to business analytics, payments, and reports
25. Can I delete a single role assigned to a user?
A. Yes, you can delete a single role once added with the help of the following steps: -
Step 1: Once you have added a user you can view their name on the user list
Step 2: Tap on the user's name
Step 3: You will be taken on the edit user page where you can view all the details of that user.
Step 4: Tap on the ' X ' icon on the role you would like to delete for that user.
26. How do you get customer feedback and rating on the store?
A. Customer when makes a payment using any payment mode, gets a receipt of the same via a link in an SMS. On the same link customer can rate the store and also give valuable feedback. The merchant can check the rating on the smarthub vyapar app itself, follow these steps:
Click on Bizview tab from the navigation bar (bottom of the screen)
Scroll down and go to store rating section.
1. When do we receive settlement into the bank account?
A. Payments get settled on next day into the bank account.
2. What to do if settlement is not received?
A. Settlements are received by next day, but in case of technical issues delay can happen for few hours. If the payment is not received as per the above-mentioned timeline, then please reach out to us on merchantsupport@hfdcbank.com.
3. Is there an option to get same day or instant settlement?
A. Yes, there is an option to get instant settlements but only on UPI Payments.
4. How to switch to Instant settlement?
A. To switch to Instant settlement, follow these steps:
Step 1 – Tap on more button (bottom right button on the screen) and then select profile option
Step 2 – Scroll down and select Instant Settlement from the list
Step 3 – Select the TID(s) and click on switch settlement.
5. Can we switch back to next day settlement?
A. Yes, once opted for Instant settlement only after 24 hrs merchant can go back to next day settlement option.
Step 1 – Tap on more button (bottom right button on the screen) and then select profile option
Step 2 – Scroll down and select Instant Settlement from the list
Step 3 – Select the TID(s) and click on switch button.
6. How to validate the settlements done in the bank account?
A. There are two ways to validate whether the payment have been settled:
Option A – Credit to bank section in the SmartHub Vyapar App
Option B – By checking the Bank Account statement.
7. What is Credit to Bank section in the SmartHub Vyapar App?
A. Credit to Bank section is the one view summary of all the payment(s) settled into the merchants’ bank account for the given day or for the selected time period. To Access Credit to Bank section, follow these simple steps:
Step1- Open your HDFC Bank SmartHub Vyapar
Step2- Enter your mPin
Step3- On the below navigation tab tap on ‘Settlement’.
8. Can we check for settlement amounts for previous days?
A. Yes, we can check by applying the date filter provided at the top in the 'Settlement' tab.
View All Videos
One-stop business & banking solution

One-stop business & banking solution
Instant, digital onboarding

Instant, digital onboarding
Accept payments easily

Accept payments easily
5 tools to help your business

5 tools to help your business
Enable Tap N Pay

Enable Tap N Pay
Create Offers & Rewards

Create Offers & Rewards
Easy, paperless onboarding

Easy, paperless onboarding
Get money on UPI quickly

Get money on UPI quickly
Get instant voice notification

Get instant voice notification
Get pre-approved loans

Get pre-approved loans
Record customer dues easily

Record customer dues easily
Record cash payments

Record cash payments
Create campaigns with ease

Create campaigns with ease
Accept payments from customers
Accept payments from customers
Redeem Offers & Rewards

Redeem Offers & Rewards
Make payments digitally

Make payments digitally